

How To Repair Brick Patio
Melissa stock-still her brick paver patio without professional assistance, and it turned out smashing.
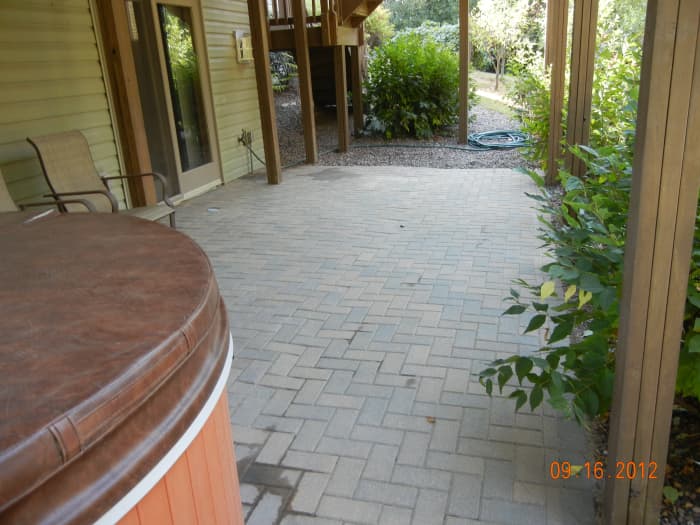
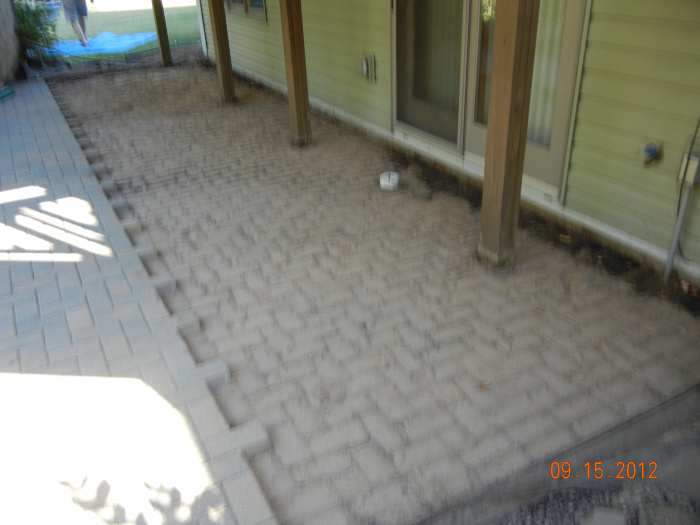
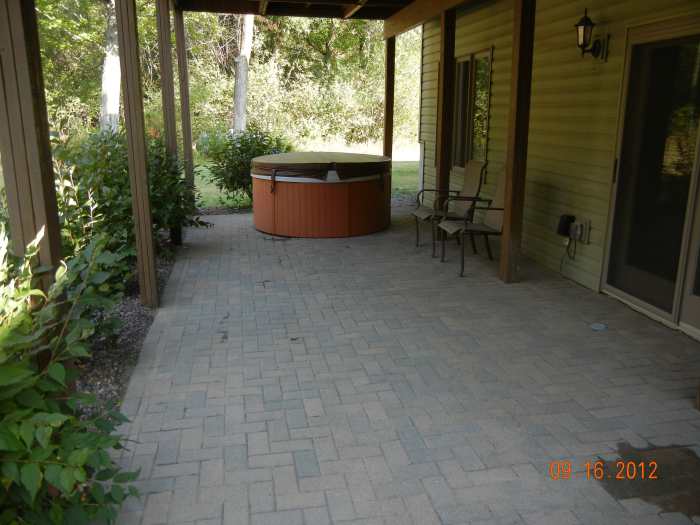
Hither is our repaired patio
Repairing Your Ain Paver Patio
Half dozen years agone, we had a beautiful 24x12 brick paver patio installed at our house. Nosotros had additional landscaping also done, simply the patio itself toll approximately $4,200 and took two men most four days to complete.
Unfortunately, the ground has settled over the last vi years, and although our patio has never cracked, it began to sink and gradient toward our foundation. That meant that whatever pelting or water run-off would exist settling near our firm rather than away from the foundation.
Nosotros haven't had whatsoever water damage, simply nosotros have been lucky and had a couple of dry years in a row. Not wanting to push our luck, we decided to get an estimate for repairing the patio.
Cost to Do It Yourself vs. Hire a Professional person
We chosen a few landscaping and patio installers to find out how exactly what needed to be washed to fix our settling result and how much it would cost. The professional cess was that we would demand to pull upwardly the 8 feet closest to our house, add some additional gravel/sand to build up the footing level, and and then relay the paver patio bricks down once again.
The slap-up thing well-nigh using bricks instead of cement is that you tin can reuse the exact same bricks. They will still match the other 4x24 feet of brick exactly, and you do not have the expense of ownership new material. Nosotros figured this couldn't cost very much, but we nonetheless volunteered to pull up the bricks ourselves to save the expense of that transmission labor. Even taking that into account, nosotros were shocked to get estimates of $1,500 dollars!
We are not the most "handy" people, but this was more than nosotros were willing to pay. We decided it couldn't hurt to try to do it ourselves! Equally information technology turned out, we are actually very happy with the results of our showtime DIY project. The materials were less than $100 plus our own very cheap (as in free) labor. It was a grueling solar day, but we managed to consummate the task in x hours and save ourselves $i,400 dollars.
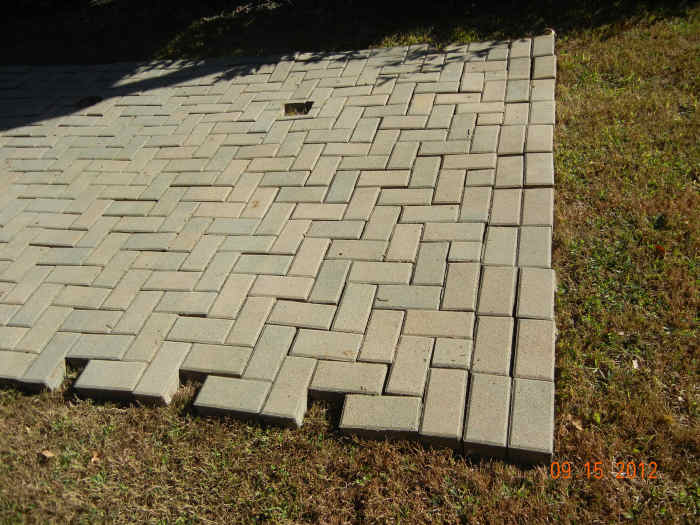
Bricks pulled up from our patio and placed in our backyard till we were able to "re-install" them.
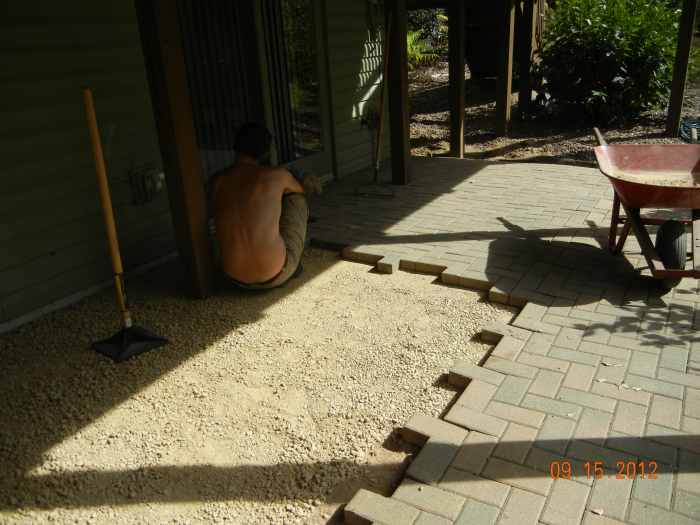
Step 1: Fix Your Patio
The first pace in repairing our patio was to pull upwards the paver patios bricks. That turns out to be extremely like shooting fish in a barrel. The free-standing blocks are just laid next to each other in whatever pattern you have selected. Then, instead of being cemented into identify, a polymer sand is swept in between the bricks and forms a "glue" made of sand.
We started on the edge and pulled up the beginning couple of bricks. Later that, it was very uncomplicated. Each brick was continued to each other but by the sand, so they came apart really easily. Nosotros stacked the bricks onto our grass in a similar pattern, simply so we would remember where to put the bricks back when nosotros were done!
This what was left afterward nosotros pulled upwards the bricks. That is just sand.
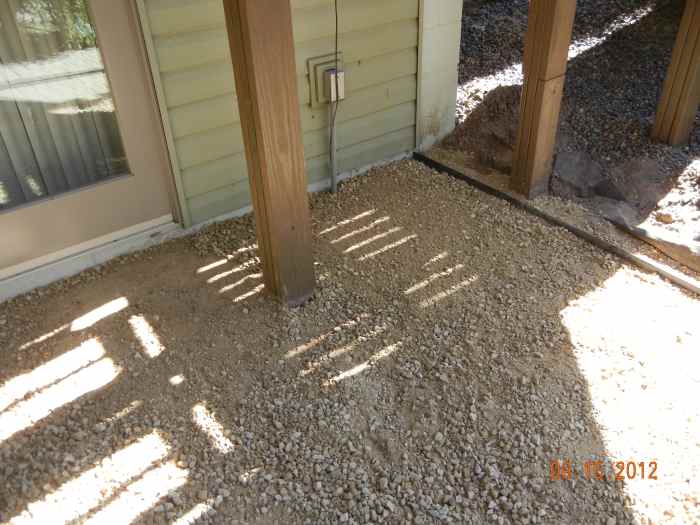
Nosotros spread the gravel and so tamped information technology down to make information technology apartment.
Step 2: Add together Gravel
Once we had pulled upwardly all the bricks, nosotros needed to add a layer of gravel or sand to raise the patio up about 1 1/two inches that information technology had settled over the half dozen years. We chose to use gravel because we idea it would be easier to work with than sand.
Nosotros went to a local landscaping place and found out that a truckload of blackness dirt, gravel, or sand was yet toll—$32 for a truckload of gravel. We weren't certain how much we would need, simply at that price were didn't take a trouble going back for more than if necessary. One truckload, however, was perfect for filling the 8x24 space we needed.
The just equipment nosotros needed was a wheelbarrow, shovel, rake, and manus tamper. All those things are pretty mutual, except for the terminal item. Nosotros happened to have a tamper (don't ask me why; I take no idea) on hand. If you lot needed to purchase ane, however, it would price you about $30 at your local hardware store or large box.
Roll to Go on
Read More From Dengarden
We started shoveling in the gravel and then raking it across so that information technology was more evenly distributed. One time we had a good layer across the whole 8x24 area, nosotros used the tamper to compact it down and make it flat. Then we checked to make certain we had raised the level of the ground loftier plenty to get rid of the slope. We could accept used a leveler, merely instead, we but "eyeballed" it.
Since the brick originally fit right under the siding, we knew that was the level we needed to raise information technology to. We could have added some additional sand on top of the gravel, simply we opted to skip that. If we had chosen to practise that, information technology would only have cost an boosted $32. We just didn't notice it necessary, and sand is a picayune more than hard to work with than gravel.
Laying the brick was like putting a really easy puzzle together!
Step 3: Lay the Brick
Putting the brick back in place turned out to be a very piece of cake job. The footstep PRIOR to laying it back is one that could have probably been done more efficiently. Although pulling upwardly the brick was easy, the bricks withal had some sand attached to the sides. We didn't desire any of the sand left on the bricks considering they would not fit back together as nicely if there was former sand still clinging to them.
Wearing piece of work gloves, we rubbed each brick by hand, and the sand fell off with some brisk, vigorous rubbing. Cleaning five–x bricks would be no big deal. Simply cleaning several hundred (maybe fifty-fifty a one thousand, I didn't count) was very time-consuming. We estimated that cleaning the bricks added some other iv hours to the full time.
We thought well-nigh just hosing them off, but then we would accept had to wait for them to dry, and since the sand was polymer sand (like a glue made from sand), we were hesitant to use water. What nosotros did worked; I'm only maxim be prepared to spend a little time on that step!
Nosotros placed the brick back down onto the tamped gravel, making certain to follow the original pattern. We didn't lose a single brick in the process, and of form, we had the exact corporeality we needed.
Add the polymer sand after you finish laying the bricks.
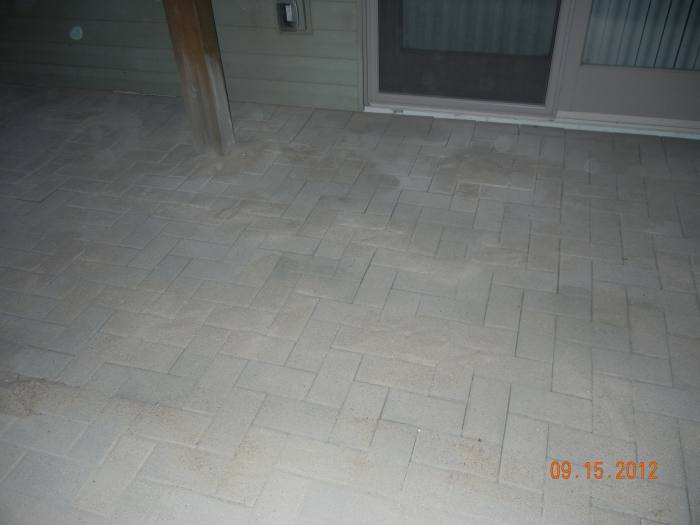
Step 4: Add together the Polymer Sand
The last step was adding the polymer sand. Although the patio looked bully, yous need information technology to stay in identify. You as well don't want any weeds or grass growing up between the bricks. You exercise this past using polymer sand. We bought 3 50-pound bags of sand at Menards for $10 apiece. You pour the sand out onto the patio.
This is a actually fine sand, so lots of dust. It is non toxic and will non harm yous, but I still recommend wearing a dust mask, or at the very to the lowest degree, I wouldn't be singing while you work . . . unless you like to swallow sand. And that is a dissimilar story.
After you have poured it onto the patio, you take a broom and sweep from i side of the patio across to the other. The sand falls into the cracks and crevices in between the bricks. Keep sweeping until the crevices are filled up, and information technology is even with the bricks. Then sweep any extra sand off the side of the patio into the grass. Do Not get out whatever sand on top of the bricks.
Terminal only not least, you take a hose and moisture the patio downwards. The water soaks into the polymer sand and creates the locking agent (like mucilage) to grade. The make nosotros used asked u.s. to wet the patio downwardly three times, ten minutes autonomously. Make sure y'all don't over-water! You don't want to launder the sand away; y'all just want to dampen information technology.
All Done! Sit Back and Enjoy
Adding the sand was the last step. The total investment in materials for united states of america was under $75. It took two of the states virtually x hours, and our muscles were really sore for a couple of days . . . but we saved $one,400, and nosotros were really proud of ourselves. It looks great!
We feel so confident that we now call back we could build our own patio from scratch side by side time. Okay, that might be pushing information technology—but we would probably be willing to at least consider it. Seriously, if my husband and I can practice this, so can you lot. Salve yourself the money and do it yourself!
Completed in a solar day and under $100 dollars.
This article is authentic and true to the all-time of the author's knowledge. Content is for advisory or entertainment purposes only and does not substitute for personal counsel or professional communication in business, financial, legal, or technical matters.
Questions & Answers
Question: Do I have to use gravel or sand? Tin can I only place bricks over clay?
Answer: The bricks are "floating" on the gravel/sand so that they can movement around slightly, but all the same stick together with the binding sand. If you simply laid the bricks on dirt, they would non exist connected together.
Question: Where do you get the textile for fixing your brick patio so cheaply?
Answer: Check out places like Dwelling Depot or Menards. Also, your local landscaping centers often sell the materials in bulk, so you can make full up the dorsum of a pickup truck with the materials you need quite inexpensively.
MichelleDurham on January 22, 2022:
This is a really nice tutorial. Information technology is very easy to follow. I also found another tutorial at Anthony Lee Rogers' website (http://www.anthonyleerogers.com/ ) which I also find very educational. Thank you!
jaycmw18 on May 16, 2022:
I just relayed my 50+ yr old brick patio following this DIY page and it worked well. The only problems I ran into using such erstwhile brick was that they were 3 different sizes of brick so information technology fabricated it difficult to make it perfectly level. In those areas I simply used more or less sand and compacted it to accept information technology fit best I could. Gives it character I say...
I used pressure treated 1"x3" wood to create my edging around the brick and held them in place using 2"x2' iron rods. It looks 100% improve!
Elizabeth Parker from Las Vegas, NV on November 01, 2022:
Wow! This is very impressive and looks similar yous did a slap-up task! We accept pavers in the back and this hub will come in handy when nosotros need to supercede them. Thanks and so much!
Melissa Propp (author) from Minnesota on May 08, 2022:
Cheers Jools99. Really, if it was unproblematic enough for my husband and I to do, I'm sure just almost anyone could practise information technology! I'thousand not a typical DIY'r, but it actually would save you a lot of coin...Thanks for stopping by and commenting!
Jools Hogg from Due north-E UK on May 08, 2022:
Very useful commodity. Nosotros are considering redoing our back garden patio - information technology is sloping in a number of places due to a rabbit we had who dug warrens under information technology (not one but many!!!). You accept made me realise that with a chip of know how, patience and the right gear, we could do this ourselves. Well Washed on a great job!
Melissa Propp (author) from Minnesota on November 28, 2022:
Thanks! It really wasn't all that hard, considering the "skill" level that we were at--which was definitely novice or beginners. But, I will admit my muscles ached for days! Thank you for your comments.
Mary Hyatt from Florida on November 28, 2022:
You and Hubby sure were brave to undertake this project! I'm pretty handy effectually the business firm, simply I don't recollect I could have done this. I built a little area in my yard about 10X10 feet using physical stones made from a mold. They croaky terribly. I finally just took them up!
Great "how to" Hub.
I voted it Upwards, etc.
Melissa Propp (writer) from Minnesota on November 08, 2022:
Thanks alocsin! Yeah, nosotros stayed away from the concrete since we didn't desire it to crack if information technology settled to much. I think laying concrete would be a useful skill to possess besides!
Aurelio Locsin from Orangish County, CA on November 07, 2022:
A nicely done moneysaver. One advantage of a brick paver patio, every bit opposed to our slab patio, is that the one-time doesn't crack as much, and if it does, it's easy to supersede a cracked brick or ii. Our slab has several cracks in information technology. Voting this Up and Useful.
Melissa Propp (author) from Minnesota on October xvi, 2022:
Thank yous Beak! This was my first attempt at a "how to" hub. My husband and I aren't very handy, simply nosotros were so proud of ourselves when we finished this and information technology actually worked! Thank you over again for your back up and comments. :)
Bill Holland from Olympia, WA on October 16, 2022:
I'm not sure how I missed this, but I'thousand here now. Very practiced instructions! I have really done this and your tutorial is right on and simply detailed enough to keep someone from having any problems. Good job!
Melissa Propp (writer) from Minnesota on September 29, 2022:
Thank Julie! I capeesh your feedback.
Blurter of Indiscretions from Clinton CT on September 29, 2022:
Wow. This was a great little tutorial. I hope this article does well for you. Great photos and explanation.
Source: https://dengarden.com/decks-patios/DIY-Fixing-a-Sloping-Paver-Patio
0 Response to "How To Repair Brick Patio"
Post a Comment